Showing posts with label upcycle. Show all posts
Egg Carton Flower Lights
 With the weather getting nicer and the days getting longer, we find ourselves on our front stoop, enjoying the end of the workday. So it's only natural for us to keep the stair area inviting. We spotted these charming egg carton flower lights on Esprit Cabane (an online site for crafty and green ideas). How-to and more views after the jump!
 The website suggests saving different colored egg cartons for a whimsical look. You'll first want to cut away excess cardboard surrounding the cup strips and then cut out each individual cup. With scissors, trim the edges of each cup to form flower petals.
Starting at the cup opening, make a short slit into each side of the cup. Then simply insert one LED bulb into each "flower". To make the flowers decorative, use a hole punch or the tip of a sharp instrument and punch holes through the "petals."
 This image is from Sabrina, who used Esprit Cabane's tutorial to make her own flower lights for her patio--great job!
Original Post: http://www.apartmenttherapy.com
Recycled & Upcycled the Box
If you like recycled, repurposed things that are kind of minimal, keep reading!
What happened is that Tuesday is recycle night here in my street.
And, as usual, I completely forgot about it, until Wednesday morning, which was obviously too late.
My entry looked this way ... pretty ugly. Considering also that we'll have guests over the week end.
Put together the fact that I wanted to reduce this pile of boxes, and the fact that I love things made out of cardboard, means some craft action to me!




What happened is that Tuesday is recycle night here in my street.
And, as usual, I completely forgot about it, until Wednesday morning, which was obviously too late.
My entry looked this way ... pretty ugly. Considering also that we'll have guests over the week end.


Put together the fact that I wanted to reduce this pile of boxes, and the fact that I love things made out of cardboard, means some craft action to me!
--> THINK OUTSIDE THE BOX :
* Grab your boxes
* and empty can
* a stone +/- the size of the can (gravel works too)
* some scissors
* a marker
* glue


--> let's upcycle now :)
* cut the template of the vase (if you click on the picture should be the right size)
* with a can opener, take off the top of the can (you can wash the can too)
* place the top of the can in the middle of the vase template toward the top
* place the stone under the can
* mark a slot wide enough to fit the can and the stone


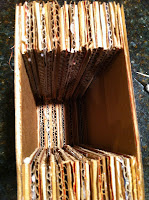
* open up the boxes until you have enough cardboard as thick as the diameter of the can (I used different kind of boxes to have a mix of colors and texture)
* cut the template of the vase with the slots


* glue the parts together and sit a nice heavy weight on top of the stack until dry


* now, cut two template of the vase WITHOUT the slot

* glue one in the front and the other one in the back, put the dictionaries back on top and let dry
* place the stone at the bottom (this will give extra stability)
* and the can on top of the stone


... you have your... 100% RECYCLED VASE!
place your 100% RECYCLED FLOWERS in it, or just addd water and real pretty flowers and you're good to go!
 |
| inspiration&realisation |
Original Post: http://www.inspirationrealisation.com


