Showing posts with label Necklace. Show all posts
10 Ways to Transform Your Space With Washi Tape
Washi tape comes in a rainbow of patterns and is easily removable without leaving damage or residue. It's the perfect material to use to decorate a dorm room and personalize college belongings.
1.

Space-Saving Jewelry Storage
Create a funky place to show off your favorite necklaces by taping a tree onto your wall with washi tape. Use small pieces of tape to create each branch, then attach necklaces with thumbtacks. This jewelry tree is completely flat against the wall and saves precious counter space in a small room.
2.

Dress Up Paper Lanterns
Coordinate a basic paper lantern to the color scheme of your dorm room by applying strips of washi tape. Pick a coordinating color scheme, like teal and gold, or go crazy and create a rainbow. Either way, everyone will want to know where you purchased that custom hanging light.
3.

No More Standard Doors
Rid your room of boring closet doors with a few strips of colorful washi tape. Extra-wide washi tape makes a big impression on large areas. Create a dynamic look by placing different washi tapes on the diagonal in a crisscross pattern. Each piece is easily removable without damaging painted or wooden doors.
4.

Personalize Colorful Frames
Tape up inspirational magazine clippings, pictures of friends and artwork with washi tape that can be easily removed and changed on a whim. Create funky geometric shapes with the tape around a few of the images.
5.

Give Personality to a Plain Table
Create a custom side table by covering a plain one with a variety of washi tape. In a diagonal pattern, place tapes in various sizes next to each other. Washi tape won't ruin a tabletop, but if you'd prefer your new piece to be permanent and water resistant, paint a few layers of clear gloss lacquer over the tape to seal it.
6.

Add Pep to Your Flowers
A dorm room will feel more like home with fresh flowers around. Personalize clear glass vases with layers of colored washi tape to match the decor of your room. Stick stripes of patterned and solid tape on top of each other to create quirky vases that your friends will love.
7.

No-Damage Wall Messages
Bare dorm room walls can be bland and boring. Fill your room with a few uplifting quotes by taping them directly onto the wall with washi tape. Try spelling out each word in a different color of tape for a true splash of color.
8.

Decorative Electronics
Never confuse your chargers with your roommate's again by personalizing yours with a funky tape design. Wrap small pieces of tape around the cord, and you'll always be able to find your chargers with ease.
9.

Lively Nightlight
Update an old lampshade with layers of patterned washi tape to create a hip, colorful new decoration for your room. For the most variety, use different widths and colors of washi tape that all have something in common. For example, these tapes are all a white pattern on a colored background.
10.

Create a Colorful Desk
Basic storage boxes are given an update with modern washi tape. Choose one main patterned tape to be the centerpiece, then choose three or four solid, dotted and striped tapes that are similar in color to those found on your main tape. This will create a cohesive look that still appears fresh and trendy.
Original Post: http://www.hgtv.com
Mini Book Necklace Tutorial
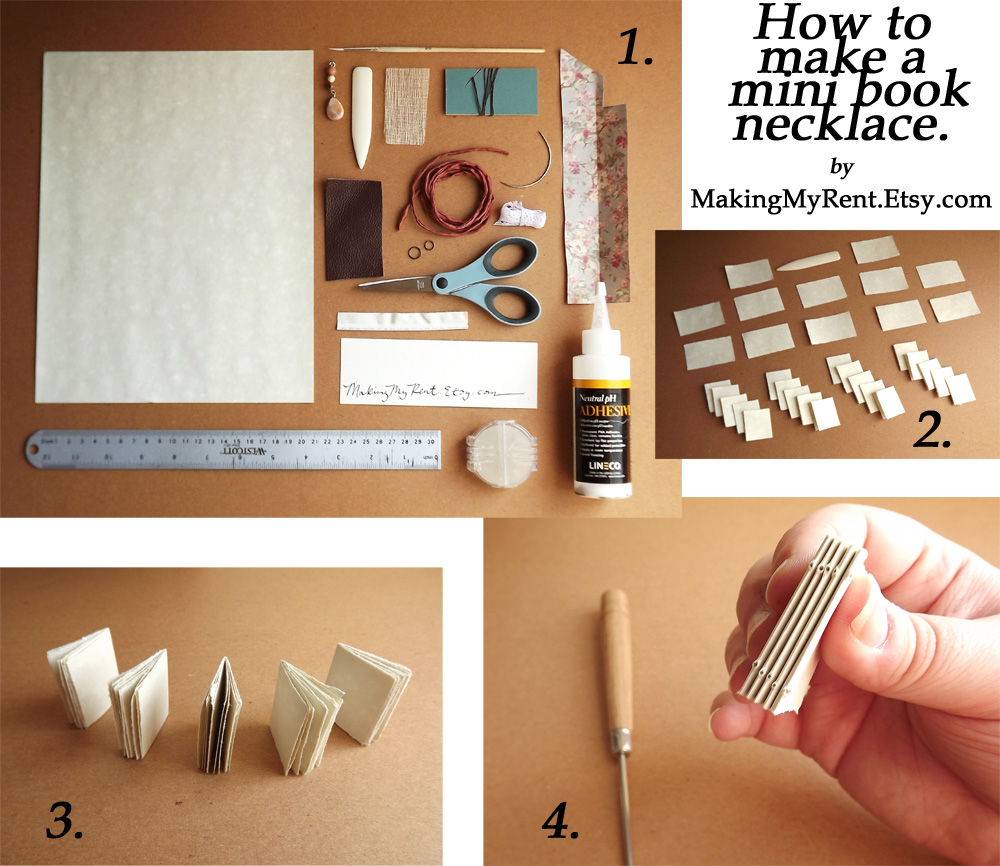
1. To make this mini book necklace gather these supplies: one sheet of paper (I used Wausau stationery), a small paint brush, scissors, super/scrim, PVA glue, linen thread, bees wax, silk head bands, leather, decorative paper, a sewing needle, an awl, two jump rings, a silk cord, a charm, and a short bit of lace.
2. Fold and tear into 16 (5mm tall x 3 1/4mm wide) rectangles, then fold those in half again.
3. Place five of the folios inside each other to form five sections.
4. Punch two holes in each section with an awl.

5. Wax your linen thread. (Or buy pre-waxed linen.)
6. Insert the needle into the first hole and out the other.
7. Then put it through the corresponding hole in the second section and through the other hole.
8. Tie the two ends of thread together and insert the needle through the first hole in the third section.
9. Insert the needle between the thread spanning the first and second section. This is called the kettle stitch.
10. Complete the fourth and fifth section in the same way. Finally, tie a knot to finish.
11. Snip off the excess thread ends.
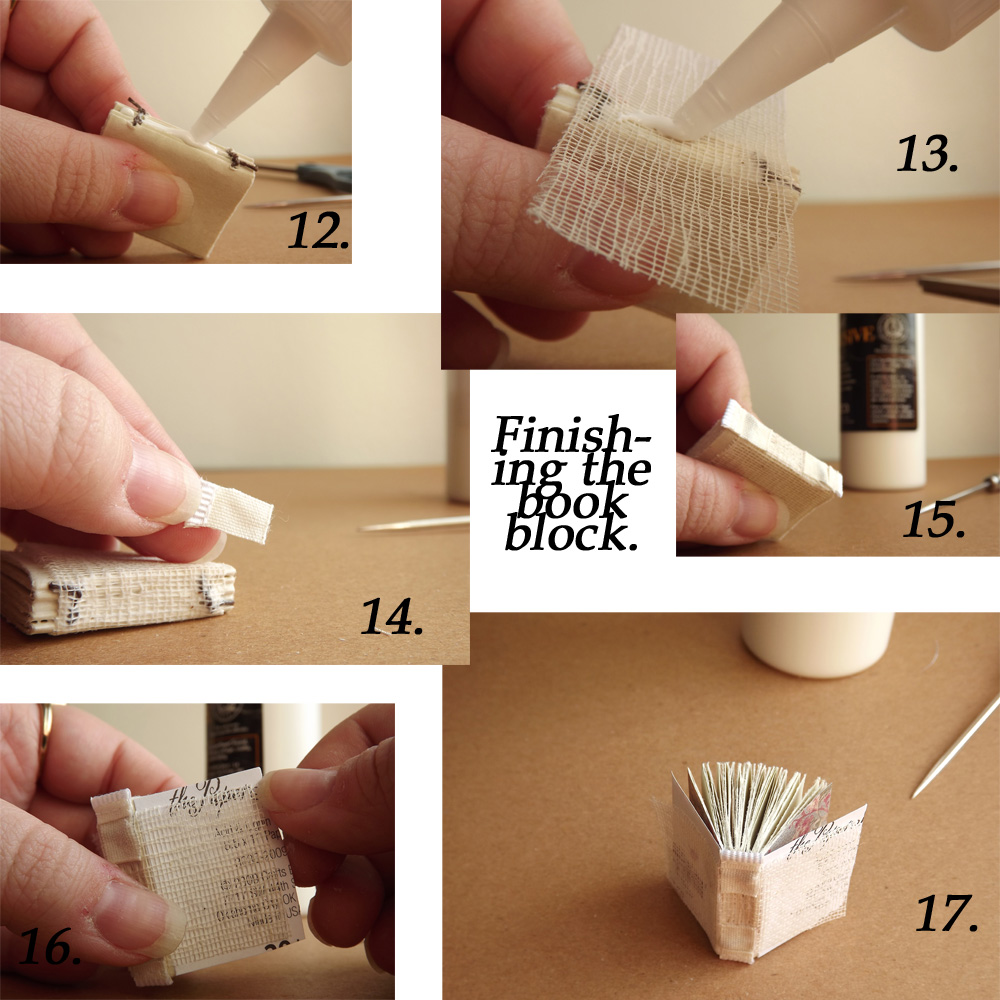
12. Glue up the spine with the PVA glue. Press under a larger book until dry.
13. Attach the super/scrim to the spine with glue. Press with your fingers or brush to make sure it's secure.
14. After letting it dry, cut silk headbands to the appropriate size and glue to the spine.
15. The finished spine will look like this. For extra security, add paper to cover the spine.
16. Glue the endpages with a narrow line of glue next to the crease. Trim if they're too large.
17. Your finished book block will look like this.
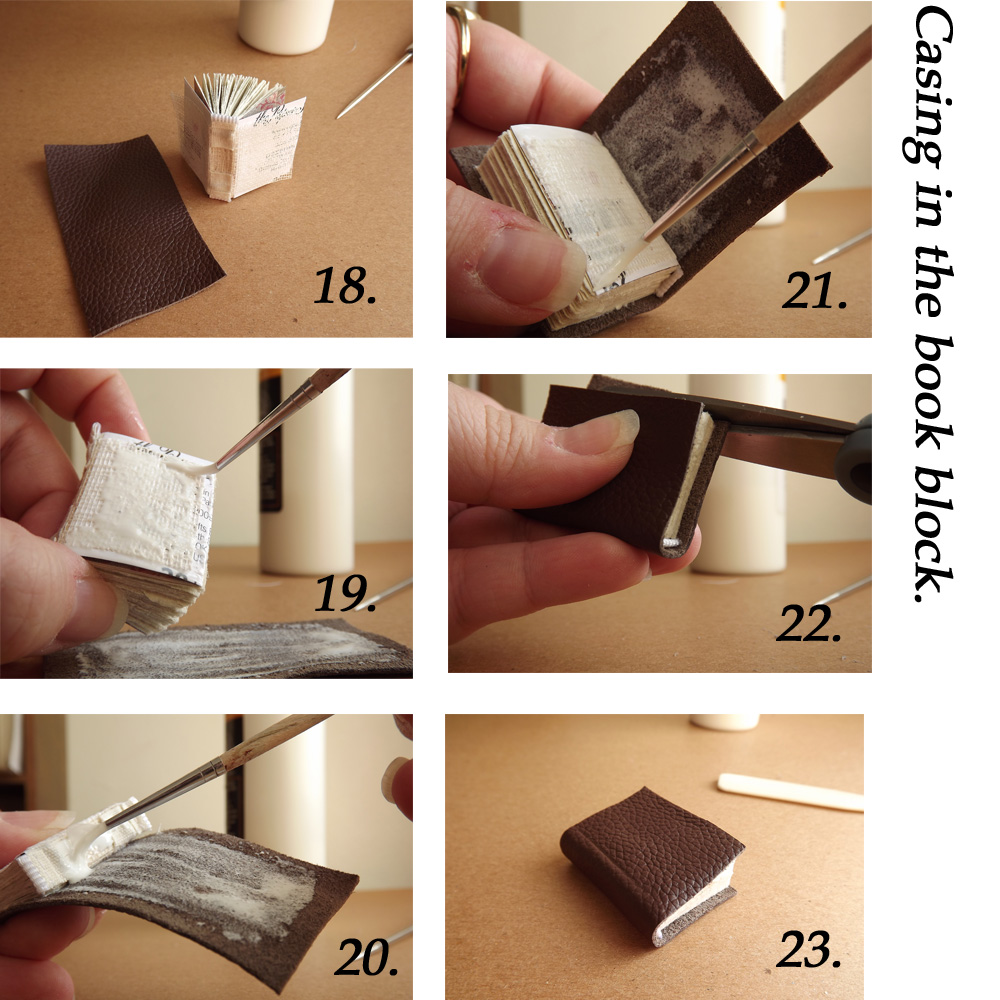
18. Cut the leather to near the size you need.
19. Spread the glue on both the leather and endpage, making sure that the the holes in the super are filled.
20. Attach the book block to the leather and glue up the spine.
21. After pressing the leather to the spine, glue the other endpage to the leather.
22. Trim excess edges.
23. Allow to dry beneath your book press. Afterward, you'll make it into a charm.

24. Open to a page near the center and punch a hole near the top where you'll place a jump ring.
25. Guide the ring through the hole and close.
26. If you'd like a lace or leather tie, use an exacto knife to cut a line in the front cover. Then, put the tie through and tie.
27. Your book charm is done! Hang it on your cord, and voilà!
 |
| This book necklace if for sale in my shop here. |
Original Post: http://makingmyrent.blogspot.com


