Showing posts with label Metal. Show all posts
10 Things to Do With a Plain Picture Frame
The DIY experts at HGTV Magazine show you how to make a boring white picture frame as pretty as a picture with these tricks.
1.

Start With the Frame
A few of our favorites: White Lacquer Emery 2.5" x 3.5", 4" x 6", and 5" x 7" frames, $2 to $3, worldmarket.com; Malden Wide Linear 5" x 7" frame in white, $12.50, aifriedman.com; Nyttja 5" x 7" frame, $4 for a set of 2, IKEA stores
2.

Stick On Fun Tape
Buy patterned washi tape that's about as wide as your frame. Cut four pieces to cover the frame, then press each down firmly, overlapping the corners. Tape: FunTape in argyle, $5 per roll, ginkopapers.com
3.

Options Galore
If you find a pattern you like that’s thinner, just use two strips side by side. Make a mistake? Just peel off the tape and start again!
4.

Put Down an Overlay

Paint the frame with yellow craft paint, and let dry. Cut a white foam overlay into four strips. Attach to the frame with clear-drying craft glue, like Aleene’s Quick Dry tacky glue ($3, craft stores).
5.

Add Flowers
Paint the frame green. Paint the outsides of four toilet paper rolls various bright colors using craft paint. Let dry, then lightly flatten the rolls and cut into 1/2-inch pieces to create petal shapes. Attach the petals with clear-drying craft glue.
6.

Dot It
Press pencil erasers into a multicolor ink pad. Stamp the frame, starting with a few dots at the top and adding more toward the bottom. To prevent smudges, coat with a clear acrylic sealer, like Krylon Crystal Clear ($6, craft stores).
7.

A Rainbow of Colors
Use one pencil eraser for each ink color. Be sure to use an ink pad that’s safe on wood. Ink pad:
8.

Wrap It in Yarn
Put a dot of craft glue on the back of the frame and stick the end of a ball of yarn to it. Wrap the yarn around one side of the frame. (We suggest starting on the inside-upper-left corner.) Snip and glue the end to the frame’s back. Repeat on all sides, leaving the corners bare.
9.

Gold-Leaf It
Brush adhesive, aka sizing medium, onto the frame. Following the package's directions, apply sheets of gold leaf to the wood. Brush off any excess, then coat the frame with clear acrylic sealer. Gold-leaf kit: Speedball Composition gold-leaf kit (includes adhesive, leaf and sealer), $11, dickblick.com
10.

Stripe It With Straws
Cut paper straws into equal pieces about as wide as the frame. Attach them with clear-drying craft glue.Straws: Summer Sunshine Stripey Straws, $4 for 20, shopsweetlulu.com
11.

Add Metal Detail
Paint the frame with blue craft paint, and let dry. Arrange two sizes of metal washers around the frame. Once you’re happy with the design, attach the washers with clear-drying craft glue. Paint: Martha Stewart Crafts satin acrylic craft paint in surf, $1.50 for 2 ounces, Michaels stores; Washers: Crown Bolt …
12.

Glue On Letters
Paint the frame and a mix of chipboard letters with two shades of blue craft paint. Let dry, then arrange the letters on the frame. Once you're happy with the placement, attach the letters with clear-drying craft glue.Paint: Matte acrylic paint on (frame) blue medium and (letters) blue light, $2 for 2 ounces, …
13.

Belt It
Use a utility knife to cut an old belt into four pieces to cover the frame, trimming each end at a 45-degree angle to match the frame’s mitered corners. Attach the belt with heavy-duty craft or hot glue. If your belt won’t completely cover your frame, paint the frame first with brown craft paint, and let dry.
Original Post: http://www.hgtv.com
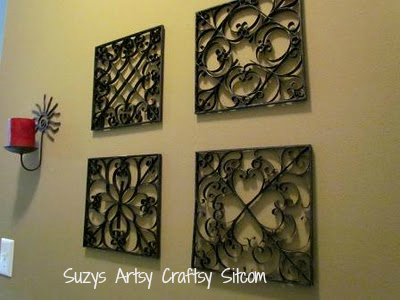
Faux Metal Wall Art

This faux metal wall art project was originally published on The Sitcom in December 2010, and was recently featured in the August issue of Crafts ‘N Things Magazine along with my free patterns. Who knew that a bunch of toilet paper tubes and an idea would become so big? Yep, I said toilet paper tubes. If you aren’t already familiar with creating from those little rolls that you would normally throw away, then stay tuned!
Anyway, I decided to try my hand at mixing some quilling techniques and toilet paper tubes to come up with some faux metal wall art to spice up my Southwestern theme kitchen.

For this project I used:
A large amount of toilet paper tubes
Several Paper Towel Tubes
Aleenes Tacky Glue
Krylon Spray Paint- Metal look
3/8″ Balsa Wood strips
Click here to go to my free pattern page
Several Paper Towel Tubes
Aleenes Tacky Glue
Krylon Spray Paint- Metal look
3/8″ Balsa Wood strips
Click here to go to my free pattern page
 | 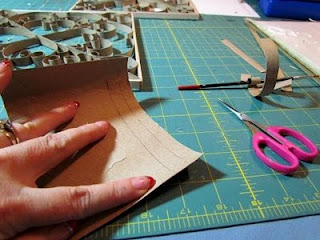 |
I started by cutting the 3/8″ balsa wood strips into 10″ long pieces to form my squares and then glued them together with tacky glue.
The paper towel tubes were used for the straight pieces. I simply cut along the length of the tube, flattened it out and used a scrap of the balsa strips to measure 3/8″ strips cut lenthwise from the tube.
The toilet paper tubes were cut in 3/8″ strips across the width of the tube to keep the curl. Simply cut along the length of the tube, flatten out and mark 3/8″ strips across the width. This will result in 3/8″ curls.
 |  |
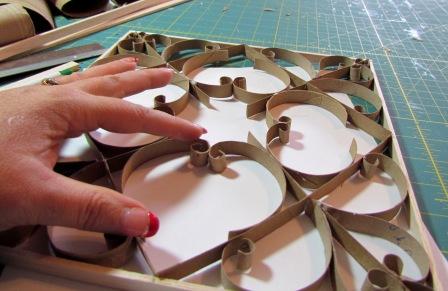
Using some examples that I found on the internet of wrought iron wall art, I created four 10″ squares. I curled the cardboard with the end of a paintbrush where I wanted curls and used the tacky glue to glue it as I went.
 |  |
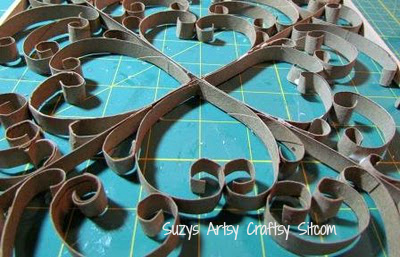
With these squares, I started by dividing it into four equal parts and then creating the same pattern in each part. I simply created as I went and used the end of the paintbrush to make any curls needed.
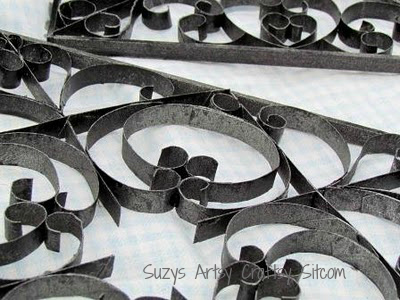
Once they were completed and dry, I then spray painted them with metal-look paint. Unless you get up close and personal and actually touch them, they look totally like metal. But didn’t cost nearly the price.
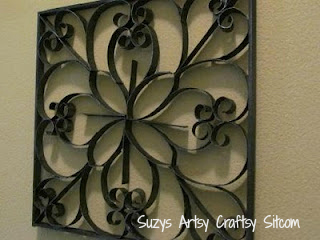 | 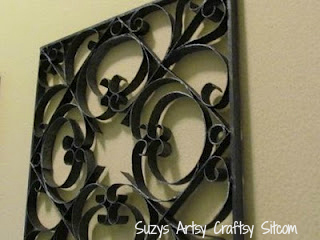 |
I now have fancy looking wall art and spent next to nothing to make it. In fact, my toilet paper loving family actually provided most of the materials. You can’t beat that!
Original Post: http://suzyssitcom.com


