Showing posts with label recycle. Show all posts
Paper Flowering Spring Branches

To get ready for summer entertaining season, this month we're sharing a mini-series of pro tips and projects from our guest blogger, party planner extraordinaire and designer David Stark. This week, his instructions for a beautiful take on flowering spring branches, usable year-round.

We are delighted to make Paper Tales available for purchase at Bergdorf’s on their iconic 7th Floor. Each world under a glass dome is hand-made in our studio in Brooklyn, utilizing vintage and antique books.
As one of our go-to art ingredients, accessibility is one of the features we love in paper, but we are also are drawn to the transformative magic that is endemic to the material. We recently created “flowering spring branches” for a party with book page blooms, and it hit us that this is a wonderful décor trick for the home. Beauty is one feature, but unlike fresh cut flowering branches from a tree, these last and last . . .
Here’s What you need:
1. 3-5 branches in which the leaves and flowers have been removed.
2. A used book from the dollar bin at your local book store.
3. A scallop paper punch from your favorite craft or office supply store.
4. A hot glue gun to glue the blooms onto the branches.

And here’s how:
1. Pull out some pages from the book and punch 30 or so “flowers”. (You can punch several pages at a time!)

2. After cutting the flower shapes, fold each scallop in half. Then turn the scallop 90° and fold in half again. Flip the scallop over and repeat the above steps, and unfold after, retaining the crease marks that create the cup of the flower.

3. Give a dot of hot glue to the underside of the blossom and affix to the branch tips.

4. Arrange in a favorite vase and enjoy.
Original Post: http://www.apartmenttherapy.com
How to Make a Recycled T-Shirt Rug
Don't throw away those old T-shirts — they can easily be turned into a one-of-a-kind doormat to decorate the inside of your dorm room.

Materials Needed:
- flat doormat
- 5-8 old T-shirts
- scissors
- hot glue gun and hot glue
Cut T-Shirt Strips
Starting at the bottom hem, cut T-shirts across into 2-inch strips (Image 2). Then cut the 2-inch strips into 4-5-inch long sections (Images 3, 4).


Tie T-Shirt Knots
Tie a knot into the center of each T-shirt section. Note: Prepare all the knotted pieces before you start gluing.

Add First Row of Knots to Rug
Place a strip of hot glue along one side of the doormat (Image 1). Stick each knot into the glue (Image 2). Continue the strip of glue and add more knotted pieces (Image 3). Glue the knots with 1/4 inch between them (Images 4, 5). Tip: If you're using a variety of colored T-shirts, glue the colors in a random pattern. It'll create a nice multicolored effect on the doormat.


Continue Gluing Knots to Mat
Keep gluing T-shirt sections in one straight line along an edge of the mat (Image 1). Continue to glue knotted T-shirt sections all the way up the edge of the mat. Move onto the next row. Place a strip of hot glue 1 inch from the previous row. Stick the knots into the glue strip, leaving 1/2 inch between each knot (Image 2). Continue to add glue and knotted sections until the full doormat is covered (Image 3).


You're Finished!
Use your personalized doormat to wipe off your shoes when you walk in from class.
Original Post: http://www.hgtv.com
Faux Metal Wall Art

This faux metal wall art project was originally published on The Sitcom in December 2010, and was recently featured in the August issue of Crafts ‘N Things Magazine along with my free patterns. Who knew that a bunch of toilet paper tubes and an idea would become so big? Yep, I said toilet paper tubes. If you aren’t already familiar with creating from those little rolls that you would normally throw away, then stay tuned!
Anyway, I decided to try my hand at mixing some quilling techniques and toilet paper tubes to come up with some faux metal wall art to spice up my Southwestern theme kitchen.

For this project I used:
A large amount of toilet paper tubes
Several Paper Towel Tubes
Aleenes Tacky Glue
Krylon Spray Paint- Metal look
3/8″ Balsa Wood strips
Click here to go to my free pattern page
Several Paper Towel Tubes
Aleenes Tacky Glue
Krylon Spray Paint- Metal look
3/8″ Balsa Wood strips
Click here to go to my free pattern page
 |  |
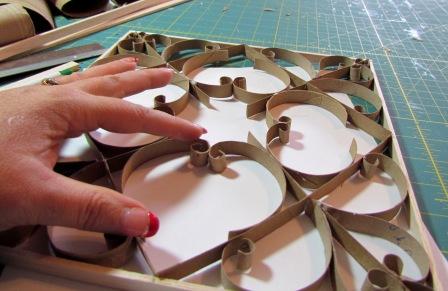
I started by cutting the 3/8″ balsa wood strips into 10″ long pieces to form my squares and then glued them together with tacky glue.
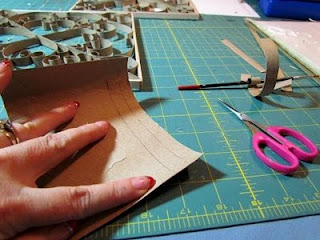
The paper towel tubes were used for the straight pieces. I simply cut along the length of the tube, flattened it out and used a scrap of the balsa strips to measure 3/8″ strips cut lenthwise from the tube.
The toilet paper tubes were cut in 3/8″ strips across the width of the tube to keep the curl. Simply cut along the length of the tube, flatten out and mark 3/8″ strips across the width. This will result in 3/8″ curls.
 |  |
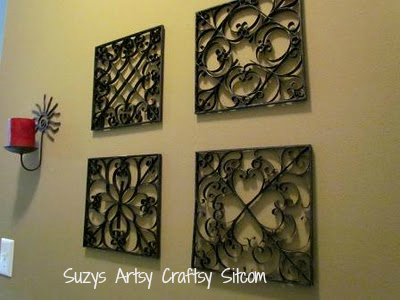
Using some examples that I found on the internet of wrought iron wall art, I created four 10″ squares. I curled the cardboard with the end of a paintbrush where I wanted curls and used the tacky glue to glue it as I went.
 |  |
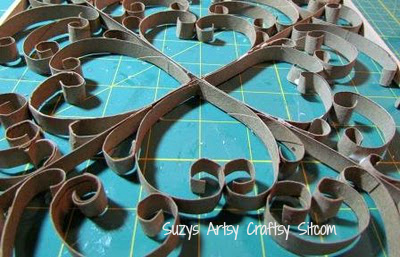
With these squares, I started by dividing it into four equal parts and then creating the same pattern in each part. I simply created as I went and used the end of the paintbrush to make any curls needed.
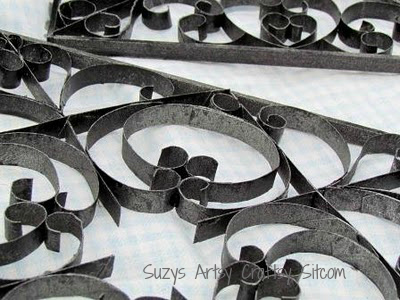
Once they were completed and dry, I then spray painted them with metal-look paint. Unless you get up close and personal and actually touch them, they look totally like metal. But didn’t cost nearly the price.
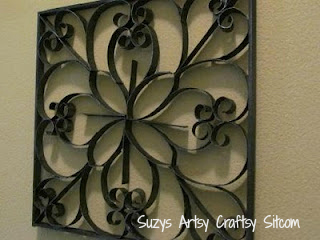 | 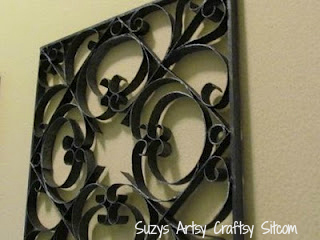 |
I now have fancy looking wall art and spent next to nothing to make it. In fact, my toilet paper loving family actually provided most of the materials. You can’t beat that!
Original Post: http://suzyssitcom.com


