Showing posts with label Toilet. Show all posts
Faux Metal Wall Art

This faux metal wall art project was originally published on The Sitcom in December 2010, and was recently featured in the August issue of Crafts ‘N Things Magazine along with my free patterns. Who knew that a bunch of toilet paper tubes and an idea would become so big? Yep, I said toilet paper tubes. If you aren’t already familiar with creating from those little rolls that you would normally throw away, then stay tuned!
Anyway, I decided to try my hand at mixing some quilling techniques and toilet paper tubes to come up with some faux metal wall art to spice up my Southwestern theme kitchen.

For this project I used:
A large amount of toilet paper tubes
Several Paper Towel Tubes
Aleenes Tacky Glue
Krylon Spray Paint- Metal look
3/8″ Balsa Wood strips
Click here to go to my free pattern page
Several Paper Towel Tubes
Aleenes Tacky Glue
Krylon Spray Paint- Metal look
3/8″ Balsa Wood strips
Click here to go to my free pattern page
 |  |
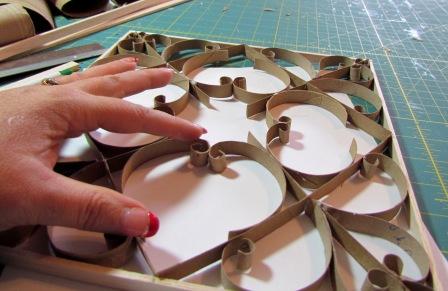
I started by cutting the 3/8″ balsa wood strips into 10″ long pieces to form my squares and then glued them together with tacky glue.
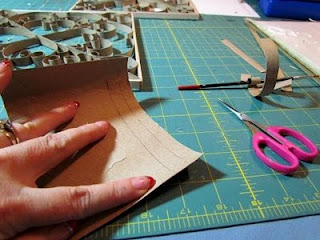
The paper towel tubes were used for the straight pieces. I simply cut along the length of the tube, flattened it out and used a scrap of the balsa strips to measure 3/8″ strips cut lenthwise from the tube.
The toilet paper tubes were cut in 3/8″ strips across the width of the tube to keep the curl. Simply cut along the length of the tube, flatten out and mark 3/8″ strips across the width. This will result in 3/8″ curls.
 |  |
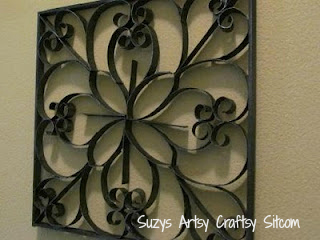
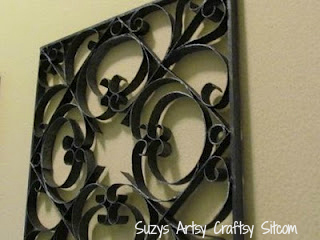
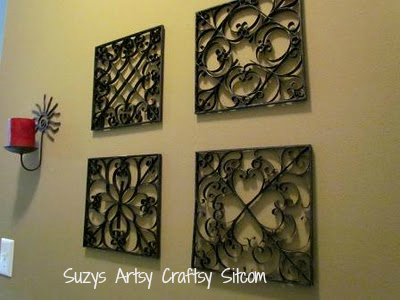
Using some examples that I found on the internet of wrought iron wall art, I created four 10″ squares. I curled the cardboard with the end of a paintbrush where I wanted curls and used the tacky glue to glue it as I went.
 |  |
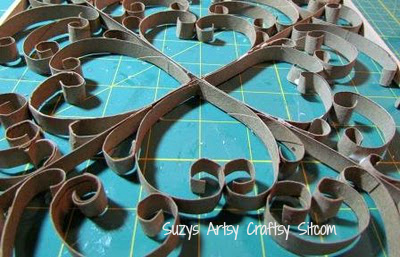
With these squares, I started by dividing it into four equal parts and then creating the same pattern in each part. I simply created as I went and used the end of the paintbrush to make any curls needed.
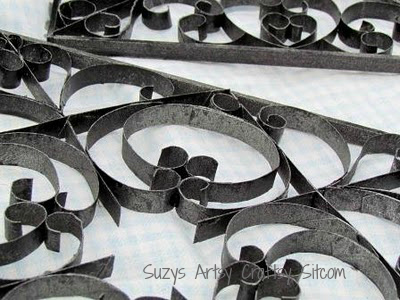
Once they were completed and dry, I then spray painted them with metal-look paint. Unless you get up close and personal and actually touch them, they look totally like metal. But didn’t cost nearly the price.
 |  |
I now have fancy looking wall art and spent next to nothing to make it. In fact, my toilet paper loving family actually provided most of the materials. You can’t beat that!
Original Post: http://suzyssitcom.com


Toilet Paper Roll Wall Art - 3
Instructions
You Will Need
o Glue
o Scissors
1. 
Gather your supplies. For this project, I used
plain old toilet paper roles, (the number you need depends on what design you
decide on for your project, mine used around 13 I think...) glue, and a bushed
metal appearance spray paint.
2. 
Crush your toilet paper roll in half, and cut
it crossways. You could measure if you like, but I just guess-timated based on
the look I was going for. For my project, each toilet paper role yielded 6
"petals".
3.
3. 
Keep cutting until you've got tons of these,
the basic unit for your piece.
<-----------
<-----------
4.
4. 
Begin glueing the "petals" together.
How you do that depends on what kind of pattern you're going for.
5.
5. 
I found that using bobby pins (any type of
clip would work too) to hold my pieces together was helpful. It gave the glue
between each segment a chance to dry while I continued glueing...
6.
6. 
Since a 5 petal flower shape was the basis for
my piece, this is what most of my base units ended up looking like. After I
made a bunch, I glued them all together in a pattern I liked, and also added a
few other viney/leafy looking segments here and there.
7.
7. 
Once you're happy with how your piece looks,
time for spray paint! (I used a metal finish paint, but any color will do!)
8.
8. 
Wait until it dries, and you'll have something
like this! (Please note I didn't spray paint every piece individually, this is
just an example I did for the tutorial. When I actually made my wall art, I
glued the entire thing together first, then painted it as a whole.)
9.
9. 
You're done! Now hang your new wall art
wherever your little heart pleases, stand back, and admire :)
And
you're done!
Original Post: http://www.cutoutandkeep.net
Toilet Paper Roll Wall Art - 2
Lets get going
 Toilette Paper rolls
Scissors
White glue
Stapler
Paint + brushes
Glitter
Laundry pins


You will need:
Scissors
White glue
Stapler
Paint + brushes
Glitter
Laundry pins
How to:
- Crush paper roll
- Cut into approximately 5 equal parts don’t have to be exact


- place the rolls on a flat surface creating a desired pattern. spend time trying different compositions and patterns.
- glue where rolls are touching, hold with laundry pins to dry. You may use a stapler as an alternative, what ever is easier. I find that glue is easier for the younger kids.
- You may paint and add sparkles. Sprinkle the glitter on the wet paint, this way it will sticks and you wont need any glue.
- You may expend the pattern in to an organic cell growth. The challenge is when to say STOP.
Original Post: http://www.growingupcreative.com


